Article Content
I first got my hands on a JZ Amethyst a few years ago, and it very quickly became one of my absolute favorites in my mic collection.
It’s full-sounding but not muddy, present and detailed but not hyped — the Amethyst is a serious microphone that gives much more expensive contenders a run for their money. Far from being just a great vocal mic (though it is that), the Amethyst can capture detail and vibrancy in a wide range of sound sources.
In this article, I’m going to take a look at a few of my favorite ways to use mine in the studio.
History of JZ Microphones
JZ Microphones was founded by Latvian mic designer Juris Zarins — those are his initials in the company name. JZ’s namesake designer had decades of experience repairing Neumann, AKG and Telefunken mics, and participated in designing mics for Blue and Violet Design before starting JZ.
JZ’s mics show the influence of a designer who has an obvious familiarity with vintage studio staples. JZ has brought a sense of open-mindedness that allows their microphones to be both unique and familiar, surprising and reliable in equal measure. The bottom line is that they produce high-quality, handmade mics that can handle heavy lifting in studios of any size.
Amethyst Specs
The JZ Amethyst is a cardioid, phantom powered condenser mic. Its capsule is reminiscent of the K67, found in Neumann U67 microphones. JZ uses the same capsule in their Vintage 67 mic, though the V67 and Amethyst are different mics with sounds of their own. The Amethyst has extremely low self-noise, features a discrete Class A amplifier circuit and can handle up to 134 dB max SPL. JZ’s capsules feature gold drop technology, allowing for a lighter, faster-moving diaphragm. This results in more clarity and precision. The frequency response of the Amethyst is functional and flattering without being hyped. It has bumps in the upper midrange and low end, with a slight slight midrange scoop.

General Impressions
The first thing most people will notice about the Amethyst is its eye-catching design. Conveniently, this mic’s unique shape makes it very easy to place in front of a guitar amp (more on that below). The Amethyst’s frequency response lends itself to a “finished” sound right out of the box. Users will likely have little need for corrective EQ, especially on vocals, guitar, piano and other full-ranged instruments.
Though the Amethyst can be threaded directly onto a mic stand with no additional clip, I strongly recommend the additional shockmount.
Favorite Uses
1. Vocals
Realistically, vocal recording is likely the reason you’re looking at this microphone. I’m happy to say that the Amethyst does not disappoint as a vocal mic. Its frequency response lends itself to vocals that fit into the mix naturally — with a full but balanced midrange and tastefully accentuated “presence” frequencies. Never hyped or brittle, the Amethyst’s tone is more reminiscent of vintage tube mics than other modern “budget friendly” condensers.
This clip is from a song by my friend and frequent collaborator Suicide Mike. We both love how the Amethyst adds weight and crispness to his voice. The sound is full and forward, but never muddy:
2. Acoustic Guitar
There isn’t much reason to make this one too complicated — the Amethyst just sounds great on acoustic guitar. Its frequency response curve is a slam dunk for this sound source, beefing up the instrument’s lower register and accentuating the frequency range where we can hear the articulation of the pick on the strings — all while maintaining a balanced midrange that speaks clearly without getting muddy.
I have kind of a quirky acoustic guitar — it’s a 1950 Epiphone archtop, and its sound is much more “boxy” and mid-forward than your typical jumbo or dreadnought. I like to use my Amethyst to record it somewhat “pushed,” driving the preamp hard. The sound I get is gritty but focused, with a surprising amount of “umph:”
3. Strings
I’m a fiddle/violin player, and my fellow string players probably know how cheap-sounding condensers can capture our instruments with a harsh, brittle quality. Fortunately, the Amethyst’s brilliant top end remains smooth and silky, present but never strident. It captures the nuanced sound of string instruments with richness and detail, with a balanced midrange that doesn’t need much sculpting. With its extended frequency response, I would confidently put the Amethyst in front of any member of the string family, knowing it would capture the lowest notes capably while bringing out the brilliance of the top end.
For this article, I recorded a fiddle melody over that earlier acoustic guitar example. Both instruments got some gentle EQ and compression, as well as some room modeling reverb:
4. Drum Overheads
Large diaphragm condenser mics tend to be my favorites for drum overhead placements, and the Amethyst excels when hanging above a drum set. It has just enough top end to make a kit sparkle, but not enough to become strident. Its full-ranged sound allows you to capture the entire kit with focused, detailed low end and midrange.
In the past I’ve used the Amethyst as a mono overhead. I wanted to try a stereo placement for the purposes of this article, and because I only have one Amethyst, I paired it with an AKG C414 B-ULS set to figure 8 for a mid/side placement. I reinforced that overhead configuration with my go-to drum close mic setup — an Audix D6 on kick, SM57 on snare and EV 635a in a “wurst mic” placement.
From there, I gave the kit my typical treatments: gentle buss compression, not-so-gentle parallel compression and some room reverb:
Something about the part I played made me want to vibe it up, though. So I added some aggressive parallel saturation, along with plate reverb and tape echo, too:
For some perspective, this is what the Amethyst sounds like soloed, without the more dramatic effects:
ADVERTISEMENT
Obviously, the finished sound of this drum recording is the sum total of a few different parts — but that’s always the case. A great drum sound starts with one or two mics that will represent the whole kit — usually the overheads — and in this recording the Amethyst is filling that role capably.
A Note About Mid/Side Drum Overheads
For those readers who are unfamiliar with the sort of mid/side placement I used for this example, here’s how it works: place one mic above and in front of the kit, looking down at the snare drum at a 45 degree angle. Cardioid mics are preferable for this placement, though figure 8 works as well. Then, place a figure 8 mic coincident with the first, but pointed so it’s “listening” to the sides of the kit. This is how my setup looked:
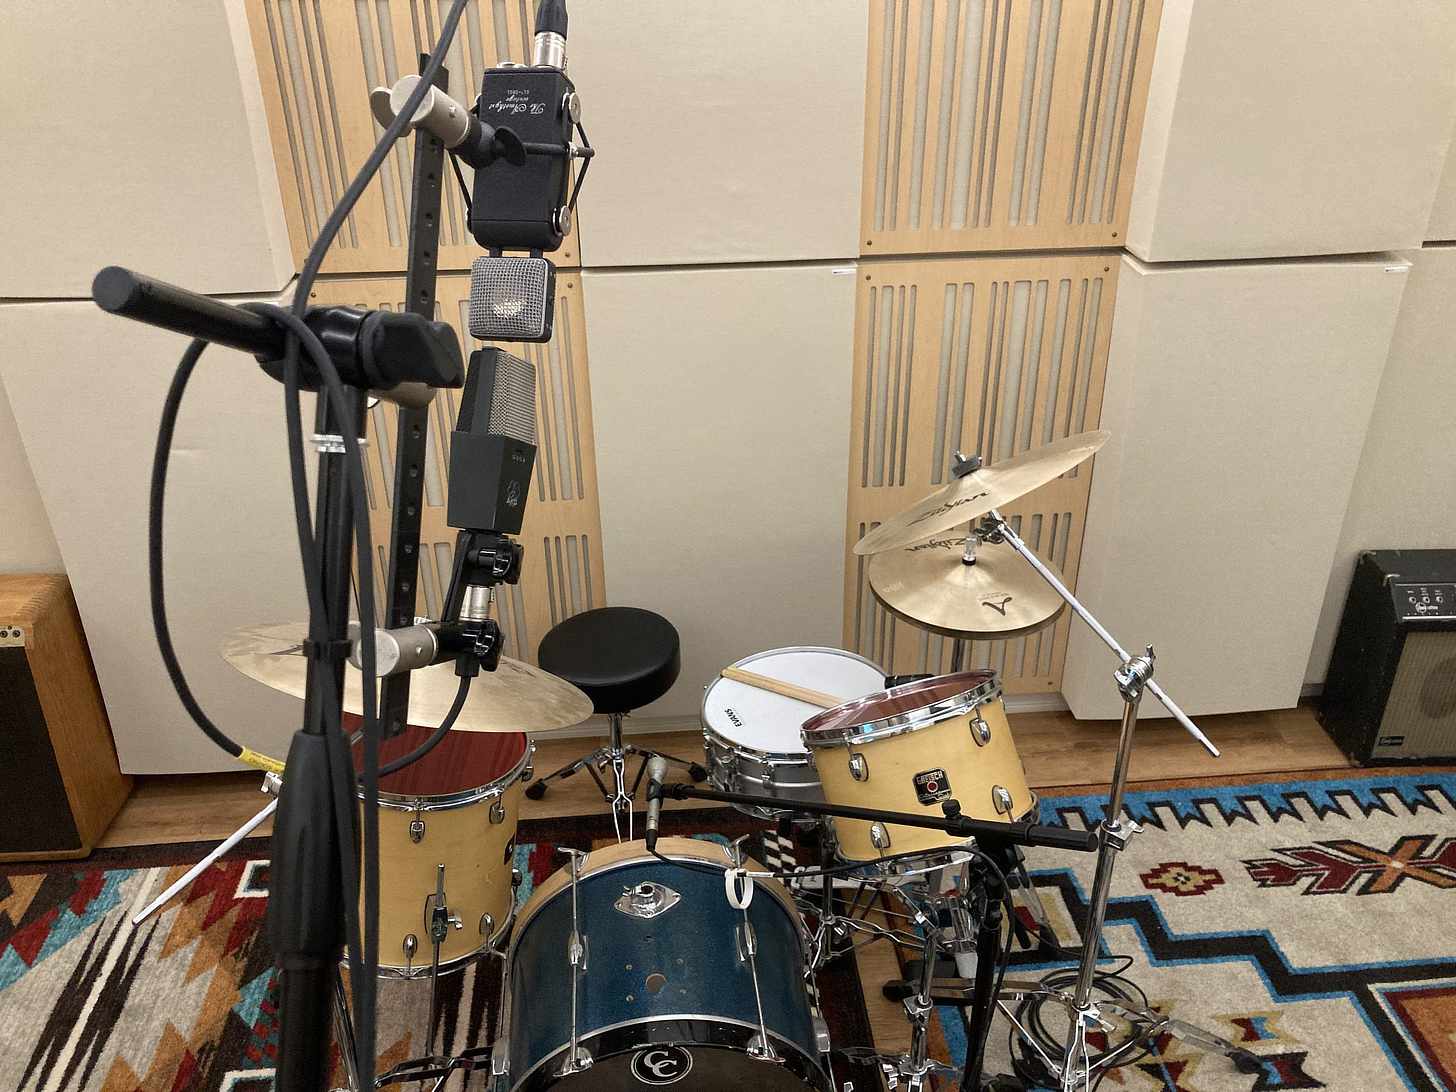
It’s important to note that that second mic needs to be figure 8 for this placement to work. The first overhead mic will stay centered, while the second will be the foundation of the kit’s stereo sound. One you’ve recorded the kit, duplicate the second mic’s signal and pan the doubles hard left and hard right. Then choose one of them, invert the phase on it, and marvel at your newly stereo drum sound. Playing with which side you flip the phase on will allow you to alternate between the drummer’s perspective and the audience’s perspective, but remember to only flip one!
5. Piano
Piano tracking can be tricky. The instrument can play a broad range of notes — 88 keys’ worth — and takes up a lot of frequency real estate in a mix. It needs a combination of strong low end, balanced midrange and clear upper midrange to really sound “right.” Fortunately, that job description is perfectly in the Amethyst’s wheelhouse.
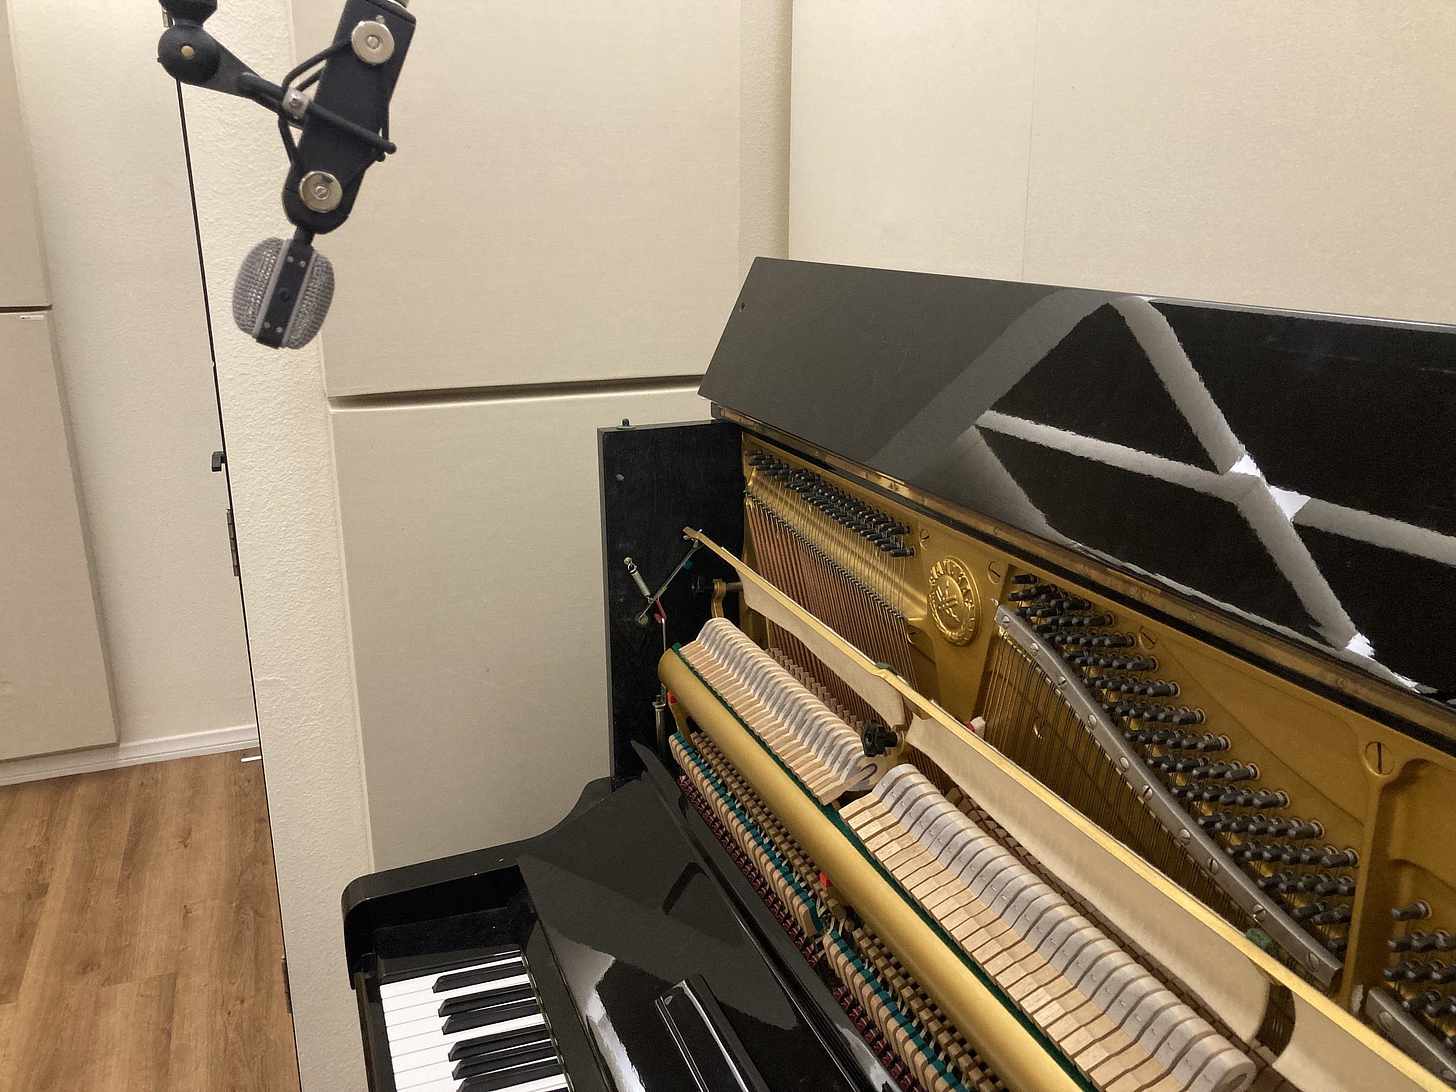
The Amethyst has a fairly wide pickup pattern, which helps to capture a large instrument like upright piano. I opened my upright up and placed my Amethyst about a foot back and a foot above the point where the hammers strike the strings, angled toward that point, centered from left to right along the piano. I applied some gentle EQ — further sculpting the midrange while boosting around 100 Hz and 10 kHz — and compression, then gave it a bit of room reverb for added depth:
One of my biggest pet peeves recording piano is upper midrange resonance. Getting the piano to sparkle without introducing harshness in the 2-5 kHz region can be a challenge, but the Amethyst manages to capture a brilliant piano recording without that sort of ugly ringing. The low end is tight and powerful, and the midrange is strong and defined without being wooly.
6. Electric Guitar
I saved my favorite application of the Amethyst for last, as I expect it’s not the first reason most people reach for this mic. That said, the Amethyst absolutely kills on electric guitar amps. Solo, it’s great at adding sparkle to jangly guitar parts. I used the Amethyst a few inches away from a Vox AC4 to record this guitar part, then touched it up with some basic EQ, heavy compression via UAD’s 1176 Rev A plugin mixed in at about 50%, and then I added some tape saturation:
The Amethyst also makes the perfect complement to a darker mic, and together a beefier tone can be had, like for powerful leads or distorted rhythm guitar. I double tracked the guitar part below to the drums and piano I had recorded earlier. I paired the Amethyst with a Sennheiser e906 on one track and a Cascade Fathead on the other, using two different guitars and two different amps. The Amethyst and mic it’s paired with are each represented about 50/50 on each track. Both guitar takes got some additional EQ, compression and saturation:
Conclusion
Condenser mics have gotten much more affordable and accessible over the years. The sheer volume of budget friendly large diaphragm condensers can be kind of dizzying. After spending a couple years with an Amethyst, I would confidently say it stands out in a crowded field — not just as a vocal mic, but in a whole range of applications. If you’re in the market for a high quality condenser mic — either as a studio centerpiece or just another addition to a stocked mic locker — the Amethyst is absolutely worth a look.
creditSource link


